

Hello, Jeep family! I finally got around to changing the oil in my differentials yesterday. Since I had done some searching (here and elsewhere) and found minimal information on the procedure for the WK2 I decided to do a step by step DIY. Hopefully this helps another gear head out! This DIY is for a 230mm rear w/ ELSD. Yours may vary.
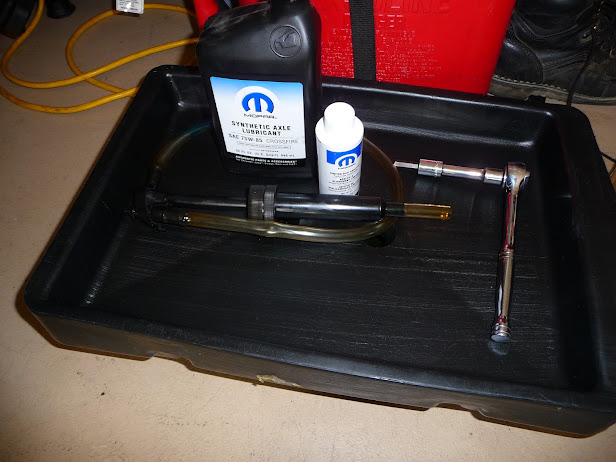
First things first! Make sure you have the materials you will need. For my particular model this included 3 quarts of liquid gold (75-85 synthetic gear lube) 1 bottle of friction modifier (my local dealer does not stock the lube with mod already in it) a catch pan, rags or shop towels, 8mm allen bit and a fluid pump. I preferred to use the socket kind of allen wrench so an extension was needed to clear the exhaust pipe in the rear. Disposable rubber gloves and cleaner/ degreaser are recommended.
![Image]()
I took a 15 minute drive around the block to warm up the oil and stir up any dirt in the diffs. If you do this be careful of hot items under your rig- exhaust pipes, catalytic converter, etc. They can stay hot for a while.
I raised the QL to the ORII level which was high enough, but in order to take some pix I needed a little more room. I made these block ramps for servicing my wifes VW and just used them here. Dont forget to chock the wheels and set the E brake
![Image]()
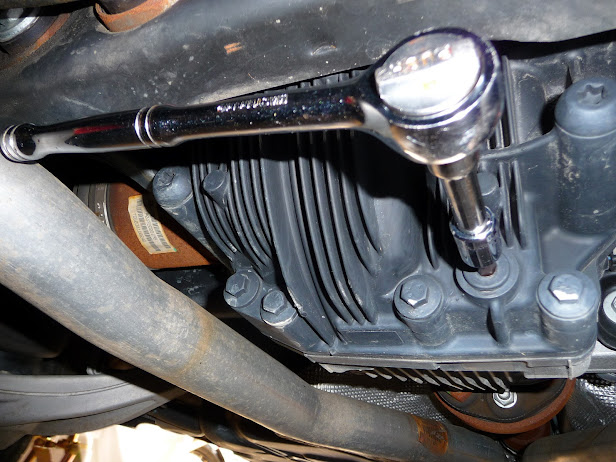
Ok, so now down to work! I did the rear first because the cat was still pretty warm. In the next photo, you will see the socket in the fill plug. Loosen or remove this one FIRST! If you drain the diff first and can't open up the fill then you are in a world of hurt because then you can't put oil back in. The plug is on the passenger side of the differential about half way up the side. The camera is pointing towards the rear of the vehicle. (Note- all plugs are 8mm allen, and standard thread- CCW to remove/ CW tighten)
![Image]()
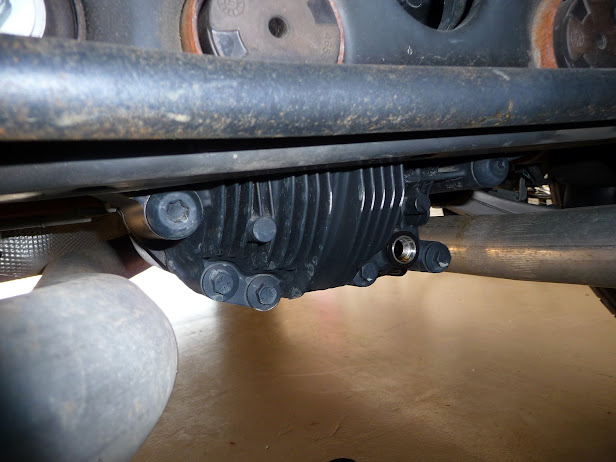
Then move on to the drain plug. This one is on the rear of the diff, lower passenger side.
![Image]()
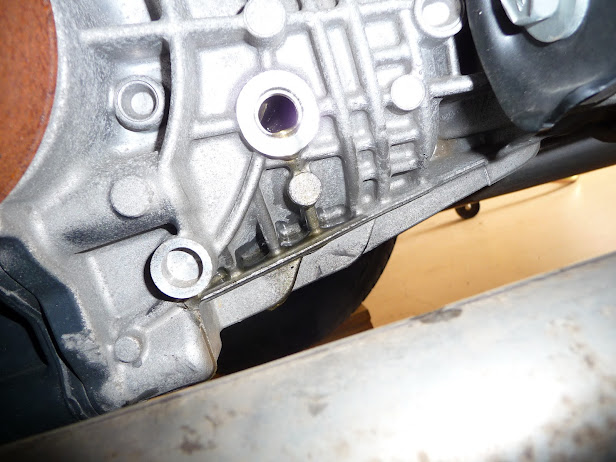
The oil was fairly dark. Not worrysome, because it is a limited slip. Those with ELSD will note that the rear oil will be darker than the front and this is normal. With the plug removed, you can see a little oil on the threads. Note the dark color.
![Image]()
After drained, reinstall the bottom plug and torque. I went to 20 lb-ft. Now, I read on WK2Jeeps.com it is supposed to be 44 lb-ft?!? I will be calling my dealer on Monday to confirm this, but it sounded excessive for an aluminum plug. I will update this post as necessary.
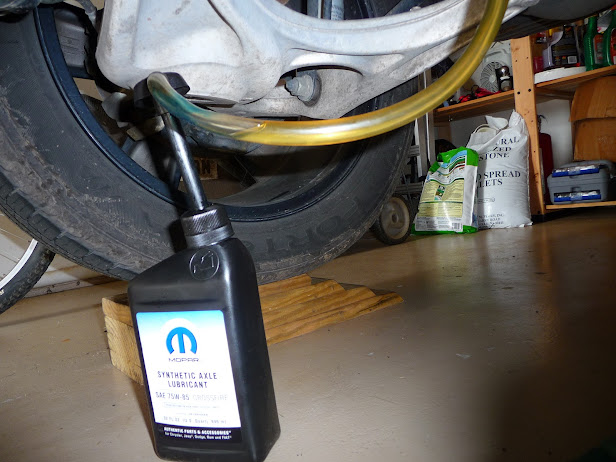
To fill, insert the pump into the bottle and the hose into the fill plug hole. You may note that a cut the top of the oil bottle off because my pump was too big for the hole. I feared knocking it over while pumping. Luckily, no such debacle!
![Image]()
![Image]()
I pumped about half a quart in and then dumped the modifier into the oil bottle. If you have the ELSD, don't forget to add it. Don't wait till the end either, as there might not be room to get it all in.
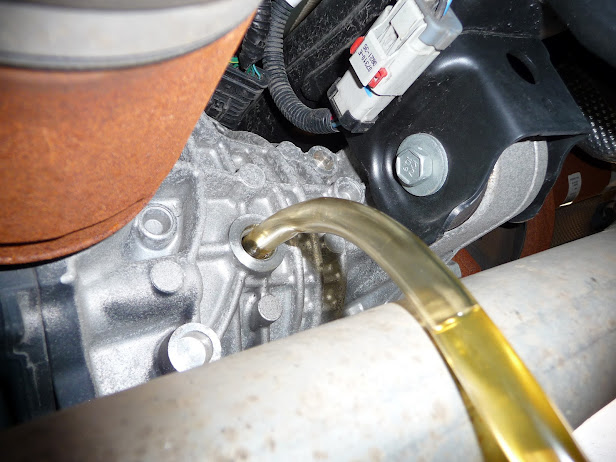
I continued pumping until oil juuust started seeping back out the hole. This is where the rags and degreaser come in. Oh, and the gloves
![Image]()
As long as you don't significantly overfill it and it is just barely weeping out, go ahead and reinstall the fill plug. Again, I torqued to 20lb-ft for now. Once you clean up any oil residue, you can move to the front. We're half way done already!:thumbsup:
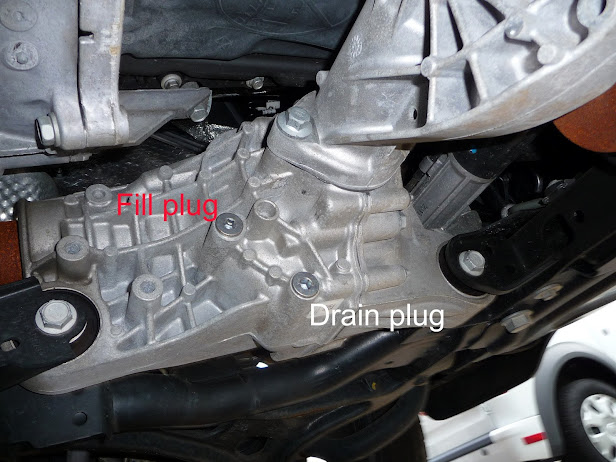
This view is from the passenger side of the vehicle. Both plugs are on the side.
![Image]()
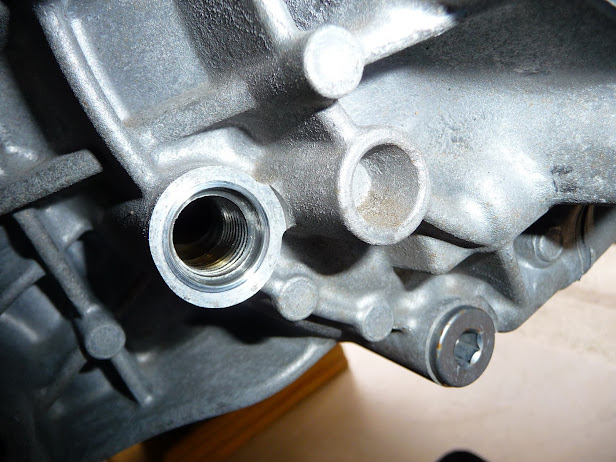
Fill plug out first!
![Image]()
Then the drain!
![Image]()
The color is pretty golden still. Definitely darker than fresh, but not black
After it finished draining install the drain plug and fill just like the rear was done. That wasn't so hard, now was it? Even taking photos it took me a whopping 45 minutes to complete and saved about $100 over the dealer!
First things first! Make sure you have the materials you will need. For my particular model this included 3 quarts of liquid gold (75-85 synthetic gear lube) 1 bottle of friction modifier (my local dealer does not stock the lube with mod already in it) a catch pan, rags or shop towels, 8mm allen bit and a fluid pump. I preferred to use the socket kind of allen wrench so an extension was needed to clear the exhaust pipe in the rear. Disposable rubber gloves and cleaner/ degreaser are recommended.
I took a 15 minute drive around the block to warm up the oil and stir up any dirt in the diffs. If you do this be careful of hot items under your rig- exhaust pipes, catalytic converter, etc. They can stay hot for a while.
I raised the QL to the ORII level which was high enough, but in order to take some pix I needed a little more room. I made these block ramps for servicing my wifes VW and just used them here. Dont forget to chock the wheels and set the E brake

Ok, so now down to work! I did the rear first because the cat was still pretty warm. In the next photo, you will see the socket in the fill plug. Loosen or remove this one FIRST! If you drain the diff first and can't open up the fill then you are in a world of hurt because then you can't put oil back in. The plug is on the passenger side of the differential about half way up the side. The camera is pointing towards the rear of the vehicle. (Note- all plugs are 8mm allen, and standard thread- CCW to remove/ CW tighten)

Then move on to the drain plug. This one is on the rear of the diff, lower passenger side.
The oil was fairly dark. Not worrysome, because it is a limited slip. Those with ELSD will note that the rear oil will be darker than the front and this is normal. With the plug removed, you can see a little oil on the threads. Note the dark color.
After drained, reinstall the bottom plug and torque. I went to 20 lb-ft. Now, I read on WK2Jeeps.com it is supposed to be 44 lb-ft?!? I will be calling my dealer on Monday to confirm this, but it sounded excessive for an aluminum plug. I will update this post as necessary.
To fill, insert the pump into the bottle and the hose into the fill plug hole. You may note that a cut the top of the oil bottle off because my pump was too big for the hole. I feared knocking it over while pumping. Luckily, no such debacle!
I pumped about half a quart in and then dumped the modifier into the oil bottle. If you have the ELSD, don't forget to add it. Don't wait till the end either, as there might not be room to get it all in.
I continued pumping until oil juuust started seeping back out the hole. This is where the rags and degreaser come in. Oh, and the gloves
As long as you don't significantly overfill it and it is just barely weeping out, go ahead and reinstall the fill plug. Again, I torqued to 20lb-ft for now. Once you clean up any oil residue, you can move to the front. We're half way done already!:thumbsup:
This view is from the passenger side of the vehicle. Both plugs are on the side.
Fill plug out first!
Then the drain!

The color is pretty golden still. Definitely darker than fresh, but not black
After it finished draining install the drain plug and fill just like the rear was done. That wasn't so hard, now was it? Even taking photos it took me a whopping 45 minutes to complete and saved about $100 over the dealer!


